Looking Back

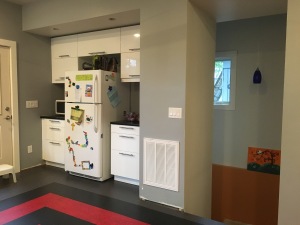
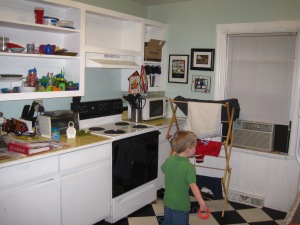
We are obviously still really behind on this blog, but we haven’t forgotten about it. As we approach the two-year anniversary of when our contractor began demolishing our old kitchen, I wanted to take a look back at how that space has changed during these two years. Two years ago, in October 2014, we still had a kitchen, but it was about to be taken apart and put in a dumpster. It looked like this:

img_9624

img_9630

img_9601

img_9623

Tiny laundry room off the kitchen

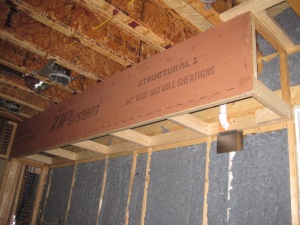
One year ago, in October 2015, we were putting insulation in the walls of our addition and preparing for drywall. The kitchen looked like this:

img_6528

img_6532

img_6533

img_6491
img_6489

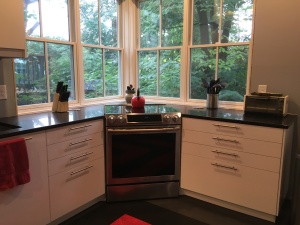
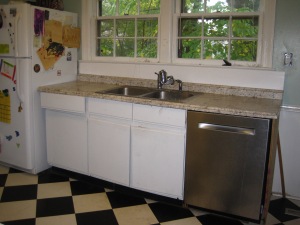
And now, here we are in October 2016. Our kitchen is not 100% complete, but it is fully functional. I know most of you don’t think about it every day, but it’s kind of awesome to have a kitchen in one’s house. There are so many blog posts that need to be written to show how we got to this point, but for now, the semi-finished product looks like this:

image

image

image

image

image

Right Here, Right Now

So…apparently when one is doing actual work on one’s house, one does not have time to blog about the work that one is doing. We have gotten so horribly behind on this that it feels overwhelming even to think about getting caught up. Instead, I will simply share a few pictures of our kitchen as it actually is right now, and maybe someday we will have a chance to write about all the things that led up to this point.

image

The IKEA cabinets are in, we’re just figuring out countertops.

image

Ignore all the blue, that’s just a protective film.

image

image

Bonus! Here’s what our kitchen looked like last April:

IMG_4153

Our contractor had just finished connecting the old part of the house to the addition.

Installing an HVAC System, Part 1

Sorry if you have been on the edge of your seat waiting to learn about what house stuff we’ve been up to lately. Today we summarize (some of) the trials and tribulations of installing our second heat pump system. A couple years ago, you may recall, we installed one for the upstairs to replace its “natural convection” heating.

The new system serves the first floor and the basement and replaces the ancient gas furnace that was removed during construction. While we were at it, we went ahead and replaced all the ductwork and the old register covers, just for fun — and because the old ones were rusty and full of dead camel crickets. The process took a few months.IMG_5440

Acquiring the unit itself is always something of a challenge. You can’t just order it on Amazon, apparently. An HVAC technician acquaintance of Amanda’s dad ordered it for us at a distributor. We got one that was slightly more efficient than the current standard in-stock models, so it took a few days to arrive. When it did, we were able to pick it up without the technician being present – but I don’t think we would have been allowed to order it by ourselves.

IMG_5445

Amanda’s dad and I did our best to level the sloping ground in the area where the new unit would sit. I think the two units are technically too close to each other and the house, but what can you do when you are sandwiched between a gas meter, a house, a hill, and a super-close property line?

IMG_5446

The new unit is a 2-ton unit, and the old is a 1.5-ton, thus the larger compressor.

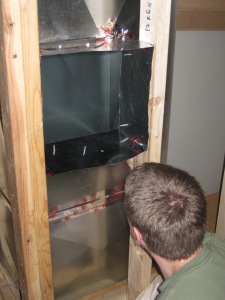
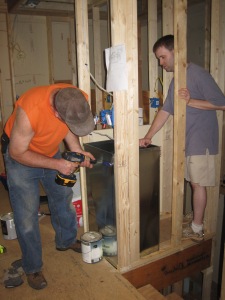
Once we got the outdoor unit (the compressor) and the indoor unit (the air handler) in place, it was time to figure out the duct work. Unlike the upstairs system, this one has two returns (where air is sucked into the system for heating or cooling), one in the basement and one in the kitchen. As a result, we needed a longer return than last time, when we made the return with plywood and flex duct. This time we chose to have a rigid metal return built for us, along with a short trunk line to carry the conditioned air to two large flex ducts. This is nice, except that you have to be really good at measuring, since you’re just giving measurements to the fabricator.

IMG_5989

Supply trunk line – looking a little like a robot.

IMG_5961

Return line.

Setting the return and trunk line in place on top of the unit was a puzzle, and things were tight – a bit too tight, to be honest. We had to shift the trunk line over a bit to get it to go up through the floor where it needed to fit. Since we did things backwards (you should always put the biggest things in the walls first), there were electrical cables in the way, some of which had to be removed and rerouted.

IMG_5709

Securing the top of the return line.

IMG_5994

Setting the supply trunk line in place.

In hindsight, we should have measured again before getting the pieces made, since we ended up having to get another duct piece made in order to shift the return line over to fit through the opening between levels. It all worked out though.

IMG_5148

Making the opening as big as possible.

We cut the holes for the returns out of the big piece that we had ordered, and were able to use the extra metal from the larger return opening to create a cap on top of the return line. Pre-drywall, we covered the large hole in the kitchen with plywood to avoid having small children be mesmerized by the opening and either fall into it or drop various items into it.

IMG_5147

Next time: flex duct, register boxes, and more!


Time to Get Caught Up

I will begin by apologizing that we got so incredibly behind on our blog posts over the last couple of months. Once we had our rough-in inspection, there was so much to do that we spent almost all of our extra minutes working on the house — and then it was the holidays. We still have lots of house stuff to work on, but things have calmed down a little bit, so I’m hoping that we can start getting caught up on posts about the projects we were busy doing for those months.

Here’s a list of some blog posts we need to write to catch up to where we are in real life:

-HVAC

-Inspections

-Insulation

-Drywall

-Paint

-Floors

-Master closet

-Appliances

-Half bath

During those busy months of house stuff, we also managed to celebrate a few things:

Thanksgiving

IMG_7073

Micah’s birthday

IMG_7211

Christmas

IMG_7368

IMG_7374

and Peter’s birthday.

IMG_7600

If you have a strong desire to read about one of the topics above, say so in the comments and we just might prioritize writing that one next. Or we will ignore the will of the majority just like we did with the kitchen floor designs.

And The Winner Is…

…The Spiral! Okay, technically it wasn’t the winner. It actually got the least votes. But Peter and I liked it the most and the boys liked it the most. When Jonah picked the spiral over the basketweave pattern, he said “It’s like a maze into the middle. It’s a square spiral. It’s very funny.” When I showed Micah the pictures of the options, he emphatically pointed to the spiral. It has already proved to be a lot of fun for the kids!

Kitchen spiral

At some point in the future, we will post more about the process of installing it and about all of the other house things we have been busy doing. We have gotten incredibly behind on the blog posts, because we have been using all of our free time working on the house. It has come a long way in the last six weeks!

Kitchen Floor Patterns

We are planning to use Marmoleum Click linoleum tiles in our half bathroom, laundry room, kitchen and master bathroom. We have settled on patterns for the half bath and laundry room. We aren’t really making a plan for the master bath ahead of time; it’s going to get the extra tiles from the other rooms and we will do our best using those. We are trying to decide on a pattern for the kitchen though. We have come up with 32 different designs (some are just variations of others), and have more or less narrowed it down to three options.

Our colors are Volcanic Ash (dark grey), Raven (black), Eternity (light grey), and Bleeckerstreet (red). Only one of the patterns utilizes the Eternity color.

Volcanic Ash

Volcanic Ash

Raven

Raven

Eternity

Eternity

Bleeckerstreet

Bleeckerstreet (the real thing is a little bit darker)

The outer two rows will be covered by white cabinets in a lot of the kitchen. I think we would be fine with any of the options, but they are very different from each other. Help us decide how best to arrange these colors.

Kitchen Option A

Option A: “The Rug”

Kitchen Option B

Option B: “The Basketweave”

Kitchen Option C

Option C: “The Spiral”

Take our poll to let us know which option you think we should choose, and we would appreciate any additional thoughts you have about these patterns. Thanks!

Built-In Bookshelf

We have been working feverishly for the past few weeks since we passed our rough-in inspection, so we have gotten a little behind on writing about what we have done. For now, here is something that someone else did for us.

When the back of our house was torn off last year, it left three places that were no longer functioning as they were originally built: a small attic door in our current bedroom, a window in our current bedroom, and a doorway at the end of our hallway on the main level of the house. We thought about making all of them into built-in bookshelves, but in the end, we decided to do that with only one, the window in our current bedroom.

IMG_3771

Before the window was taken out in March.

This bedroom is relatively small compared to the other two bedrooms in the house, and now it only has one window, so it seems fair that it should get something as cool as a bookshelf built into an old window frame.

IMG_6364

Opening from the bedroom side.

IMG_6362

Opening from the hallway side.

Peter and I are not skilled carpenters (at all). So we enlisted the help of the Small Jobs Team from our church. Larry was kind enough to take on the task and came several times to take measurements and plan for the job. Two weeks ago, he and Robby came to build the bookshelf. Before they came to our house, they swung by Lowe’s and picked up some plywood we needed, which saved us from having to borrow someone’s pickup truck to get it ourselves (a huge help!).

IMG_6368

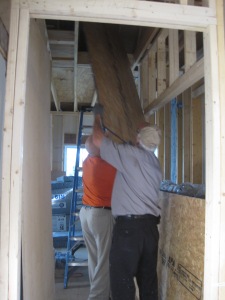
Helping Peter get the plywood into the attic (Peter is up there, pulling).

They worked hard for a couple of hours hauling plywood inside and building the bookshelf. They definitely earned their Spudnuts. The bookshelf looks great. There is no way Peter and I could have done it and had it turn out like this. It looks very professional and they took great care in making it right.

IMG_6371

Yay bookshelf!


IMG_6374

I still need to paint it (which won’t happen until sometime in 2016) and we need to put the window trim back across the top. But for now, we have a functioning bookshelf instead of a hole in the wall, which is a pretty amazing transformation.

IMG_6377

The back of the bookshelf, on the hallway side.

The shelves are only 4 inches deep because that’s how deep the window was, but it will hold plenty of knickknacks, small books, and pictures. Micah was super excited to put things on it, so he spent a while the next day bringing me books and other items that would fit.

IMG_5639

It’s perfect for small board books.

I love the bookshelf and I really appreciate Larry and Robby spending their time working on it. Thanks!

A Busy 12 Hours and 9 Minutes

Today was busy. With house stuff. The list of accomplishments includes: plumber fixed a leak in the new waste lines, we pressure-tested our supply lines, the washer and dryer were delivered, we passed our rough-in inspection, and our denim insulation was delivered. For the much more detailed timeline version, see below. Future posts will have more details on some of these items.

IMG_5542

900 pounds of insulation.

6:21 Alarm goes off
7:15 Check Micah’s temperature: 99.9
7:45 Micah and I walk Jonah to school
7:50 Peter starts working from home
8:10 Micah and I go to a plumbing supply store to buy some parts to pressure test our supply lines
8:42 Micah and I return home from the plumbing store
8:43 HVAC company calls about our bill from their work last week – it’s about $200 higher than expected (will deal with this tomorrow)
8:45 Replace one crimp fitting with a push-in (“sharkbite”) fitting so the water heater’s temperature and pressure relief valve will pass inspection
8:55 Attempt to fit together the plumbing pieces in a way that we can put pressure in both our hot and cold supply lines for inspection
9:15 Check Micah’s temperature: 103.0; we will be missing playgroup today
9:20 Wear Micah in baby carrier and attempt to pressurize our supply lines with a bike pump
9:30 Micah lays pathetically on couch and watches Curious George
9:31 Attempt to get the pressure test contraption to stop leaking so that we will know if our water lines are leaking (Peter interrupts work periodically to help)
9:50 Plumber shows up to replace leaky toilet drain that failed yesterday’s waste line pressure test (but apparently was not told what to do by yesterday’s plumber from the same company)
9:55 Plumber leaves to get the parts/tools he needs. Remark to Peter that the plumber’s hair was so long it was tucked into the back pocket of his jeans.
9:55 Continue trying to stop leak in the contraption and pressurize the supply line system
10:05 Plumber returns, cuts out old toilet drain, installs new one
11:00 Plumber uses the right tools (which we don’t have) to help tighten our contraption, but it’s still leaking
11:15 Lowe’s delivery truck arrives to deliver washer, dryer, and ladder
11:25 Plumber says his glue needs to dry before they can pressurize the waste lines again, then leaves
11:30 Lowe’s leaves
11:40 My arms are tired, so I declare the supply lines pressurized enough (90 psi instead of the recommended 100) and we find something for lunch
12:25 Put Micah down for a nap
12:30 Call plumbing company to make sure they will be sending someone to pressurize system soon; she’ll check on it
1:03 Inspector shows up for rough-in inspection (turns out he used to work for our contractor, so he actually worked on the demolition of our kitchen a little bit last fall)
1:04 Peter calls Jeffrey, our framing contractor’s production manager, who wanted to be at the inspection
1:05 Micah wakes up screaming from his nap; get him back to sleep
1:11 Call plumbing company to let them know that inspector is already here; they have no one available to come pressurize system at the moment and suggest that we reschedule the inspection
1:15 Pressurize the waste lines ourselves with the bike pump (much faster than the supply lines, even though they have a greater volume, as they only have to be at 5 psi)
1:20 Jeffrey arrives and joins the inspection party
1:40 Micah wakes up from his nap
1:45 Inspector is done and leaves; we passed all four parts of the rough-in inspection, with a manageable to-do list of things to fix/change before the post-insulation inspection
1:55 Jeffrey leaves
2:00 Plumber shows up again (at the same time as the mailman). Told him we pressurized the waste lines ourselves and that it passed inspection. He seems pleased and leaves after a few minutes.
2:20 Micah and I leave to walk and pick Jonah up from school
2:21 Delivery driver calls to say he and his semi truck will be here in five minutes with our insulation
2:23 Peter moves both of our cars out of the way so that the tractor trailer can park in front of our house
2:35 Micah, Jonah, and I arrive back home as the delivery truck is arriving, and we stay outside to watch the man unload the truck
2:40 UPS parks across the street to deliver a much smaller package to us than the insulation, while we are standing outside watching the insulation delivery
2:50 Delivery driver is done unloading two pallets of insulation into the street right in front of our house (apparently “curbside delivery” actually does mean up against the curb, not even behind it)
2:50 We work on dragging/rolling 900 pounds of insulation from the street to our porch/yard, one unwieldy pack at a time
3:00 Give boys snack and let them watch TV while Peter and I move all the insulation inside (16 packs weighing approximately 56 pounds each, if you do the math)
3:30 Peter works some more, while the boys and I play
4:45 Peter and Jonah leave for church dinner
5:45 Micah starts asking to go to bed because he doesn’t feel well
6:30 Micah is asleep – restlessly
.
We didn’t necessarily intend for both deliveries to happen on the same day as our rough-in inspection; it just sort of happened that way. I was incredibly glad that Peter was working from home today (which he did purposefully so that he could be here for the inspection). I don’t think I could have handled all of these tasks myself. Peter didn’t quite clock eight hours of work, but he made a valiant attempt to get a bit of work done in between all of the people coming and going.
 .
I don’t know how much time I actually spent using the bike pump today. It was probably over an hour. My arms are already sore, and I feel like I earned today’s ice cream. Especially since I missed the cake at church dinner.
Living Without A Kitchen, Part 2

Part 1 of Living Without a Kitchen can be found here. And now, what do we eat, and how do we cook it?

One of the ways I have been cooking without a kitchen is in the crock pot. There wasn’t a great place to put it, though, because of the limited countertop space. I needed somewhere to put it that was near an outlet and where it wouldn’t fall on the children if they tugged on the cord. The new outlet in the closet proved to be the perfect solution. Since then, one of my frequent dinner dishes has been “chicken in the crock pot in the closet.” I prepare it on the dining room table, stick the crock pot in the closet and forget about it. The children don’t bother it, it’s out of my way, and our closet smells pretty good after an hour or two.

IMG_1605

Chicken in the crockpot in the closet.

IMG_4114

We also have a BaconWave for “cooking” bacon in the microwave. We’ve only used it once or twice. Thanks, church Christmas store where children can buy “treasures” to give as gifts.

I have been able to make a lot of things without a kitchen, but I cannot boil water or bake cookies/cupcakes. On the occasions when I have really needed to bake something, I have gone to friends’ and relatives’ houses. At home, I have been using the microwave (which works fine, although the 2, 6, and 8 buttons don’t work), the toaster oven, the crock pot, an electric skillet, a George Foreman grill, and a microwave rice cooker. We registered for the electric skillet when we got married, although I’m really not sure why. I only used it a couple of times per year in the ten years before this construction project, but it sure has been my friend over these last eleven months. I have used it to cook meat, make pancakes, fry naan, cook eggs, etc.

IMG_5021

Homemade chicken tenders (which the boys refused).

So what do we typically eat? Not having a kitchen has really only affected what we eat for dinner. We still eat cereal or toast for breakfast and sandwiches for lunch. A typical week of dinners might look like this:

Monday: chicken in the crockpot in the closet with an Indian sauce

Tuesday: pancakes

Wednesday: dinner at church

Thursday: leftover chicken

Friday: tacos

Saturday: take out pizza

Sunday: leftovers from the week before

IMG_4163

I am always amazed at the amount of leftovers we seem to have. Leftovers are great because it means I don’t have to cook as often. If I’m going through the hassle of cooking “real food,” I might as well make plenty and then we can just microwave it some other night. The boys often don’t like what we’re having, so they might eat chicken nuggets or a sandwich for dinner. We do sometimes get takeout for dinner or go out to eat, but we haven’t eaten out nearly as much as we thought we might when we began this process.

We have still been able to have people over for dinner on occasion. It just gets a little extra cozy in the ditchen, and everyone who has come over knows in advance that we don’t have a real kitchen, so they aren’t expecting anything fancy.

Peter and I have always tried to be fairly environmentally conscious in our choices, but we have been a little less so during construction. We typically use cloth napkins but have abandoned those for paper napkins since we have not had a washer or dryer. We don’t regularly use paper plates, but there are some occasions when we opt for those instead of having to wash glass dishes. We have tried to be more thoughtful about the dishes that we do use. We use our water cups for two days before we wash them, and the boys use their water bottles probably a little bit longer than they should. Whenever Peter uses a plate for breakfast that ends up with only toast crumbs on it, I use that same plate for lunch, and then one of us uses it for dinner. (Don’t worry, if you come over, we’ll give you clean dishes.)

All in all, not having a kitchen has been somewhat of an inconvenience, but it’s been a fairly workable situation. This is good, since it will still be a few more months before we have any semblance of a “real kitchen” again.

IMG_6198

Thanks, ditchen sink and cabinet, for making things manageable.

Living Without a Kitchen, Part 1

We have not had a real kitchen for over 11 months now. It’s amazing to me that it’s been that long already. Before we started the process of tearing off the old kitchen, I wasn’t quite sure what to expect for how cooking without a kitchen would go. I do not cook a lot of gourmet meals, and we have a lot of yummy restaurants nearby, so I figured it would probably be okay. Turns out, I was right. It really hasn’t been that bad.

We don’t love having to wash all of our dishes by hand while our dishwasher sits in our shed waiting for the new kitchen, but I am immensely thankful that we have a kitchen sink in which to wash them. Our contractor reinstalled our previous kitchen sink and a little bit of the countertop in the dining room in the first days of the construction back in October 2014. If it weren’t for that, this wouldn’t have been bearable. I have heard stories of people who redo their kitchens and just wash dishes in the bathtub during the renovation, but those situations usually only last several weeks or a couple of months at the most. I can’t imagine not having any running water on the main level and having to go upstairs to our one bathroom for everything water-related.

IMG_9686

Sorry, dishwasher.

Our dining room has become our combination dining room and kitchen (or the “ditchen” as we often call it). It’s tight in there, but it works. It’s kind of convenient having everything so close together. There’s not much counter space on which to make food, so the dining room table often doubles as prep space.

IMG_6197

There are only two outlets in the dining room, and they were both on the same electrical circuit when we started (along with most of the first floor). As such, the circuit got overloaded very easily. It was already getting cold by that point last fall, and we didn’t have heat downstairs, so we were using space heaters to stay warm(ish). We quickly realized that we could not use more than one appliance at a time. We had to choose: toaster oven, microwave, or space heater. We didn’t have the luxury of cooking while simultaneously being warm(ish). Jonah got pretty good at reminding me to turn off the space heater before I turned on the toaster oven or microwave. We also tripped the breaker A LOT. Luckily the breakers are near the dining room and could be quickly flipped back on.

IMG_6199

Cooking area.

After about a month of this, Peter managed to add a new outlet in the closet near the dining room (where the electrical box is). We now had a single outlet on its own circuit, which pretty much ensured that we wouldn’t trip it. We typically ran a space heater off of that outlet and then only had to worry about not using two cooking appliances at once. When we weren’t cooking, we would sometimes even get to have two space heaters running at the same time and feel almost warm. It felt luxurious.

In January, Peter and my dad replaced one of the two outlets in the dining room. Now we had another outlet on its own circuit with new wiring and (bonus!) it had three prongs instead of two, so our refrigerator could be plugged in without an adapter. If you’re keeping track, this gave us three outlets on different circuits in or near the dining room. I was really pretty excited. With this plethora of outlets, I have been able to cook more easily. I can even turn on the toaster oven and, once it’s pre-heated, I can use the microwave while the toaster oven is cooking something. This speeds up the cooking process a lot.

Next post: what we make in our ditchen.