It has been almost one year since we bought the Pink House. I decided that it would probably be a good time to start catching up on old posts that we never got around to writing, about projects that were done a while ago. The craft area is one of those projects.
When we were looking for a house, one of the things I wanted was an area right off of the kitchen that I could turn into a play area, so that I could see the kids playing while I make dinner. The Pink House actually had that (the “funny room,” as we called it), but we quickly turned that into the half bathroom. There is a nook in the dining room that seemed to be the next best option. It’s not actually visible from the kitchen, but if I poke my head around and look through the doorway into the dining room, this nook is straight ahead.
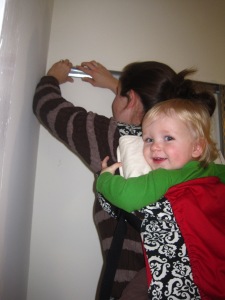
I knew that I wanted to use some chalkboard paint so that the boys could write on the walls. The kind I chose from Lowe’s comes in several different colors and I went with a red (Micah is still learning that we only write on the red wall). It was a small area, so I figured a single quart of paint would be sufficient. I had to do four coats of paint before it stopped looking blotchy, and I ended up using almost every drop of paint in that quart. I got the area painted in July and ordered some white metal strips to put around the top of the area so that the boys could hang pictures and such with magnets. I also got some baskets with magnets on them, so that I could store chalk and other supplies within the boys’ reach. I looked and looked for the perfect small table to put in the area. There were several that I liked, but they cost a lot more than I wanted to pay for a table that was probably going to get colored/painted all over by two little boys. In the end, I ordered a table and chairs from Ikea. The price was right and it works really well in the space.
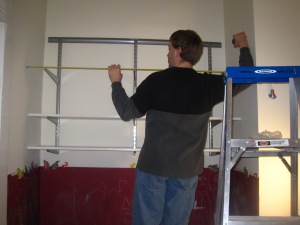
In January, I was ordering something from the Container Store and needed a little bit more in order to get free shipping. I decided that we could put some shelves up above the craft area, and gain a lot of storage in a space that wasn’t going to be used anyway, at least not until the boys are taller (by which point that table won’t work so well either). I ordered the hardware from the Container Store and then went to Lowe’s to buy the shelves. The lower two shelves are not as deep as the upper two, so that small humans will be less likely to bang their heads into them.
Peter helped, and we were able to get the shelves mounted without too much difficulty. Luckily, I had given Peter a circular saw for his birthday a few weeks earlier and I had just bought myself some sawhorses, so we were able to cut the shelves without needing to borrow tools.
We quickly filled the shelves with craft supplies and stuff that was still in cardboard boxes, waiting for a home in the Pink House. We have added even more stuff since the picture below. I love the added storage space! When we tear off the kitchen, I will pack the games back up and use the shelves to store some of our “homeless” kitchen supplies. Jonah has loved having this space in which to color and work on projects. A couple months ago, Micah learned to climb up on the chairs, so he’s starting to like it too.


I love the craft corner! Someday I’ll have one 🙂